
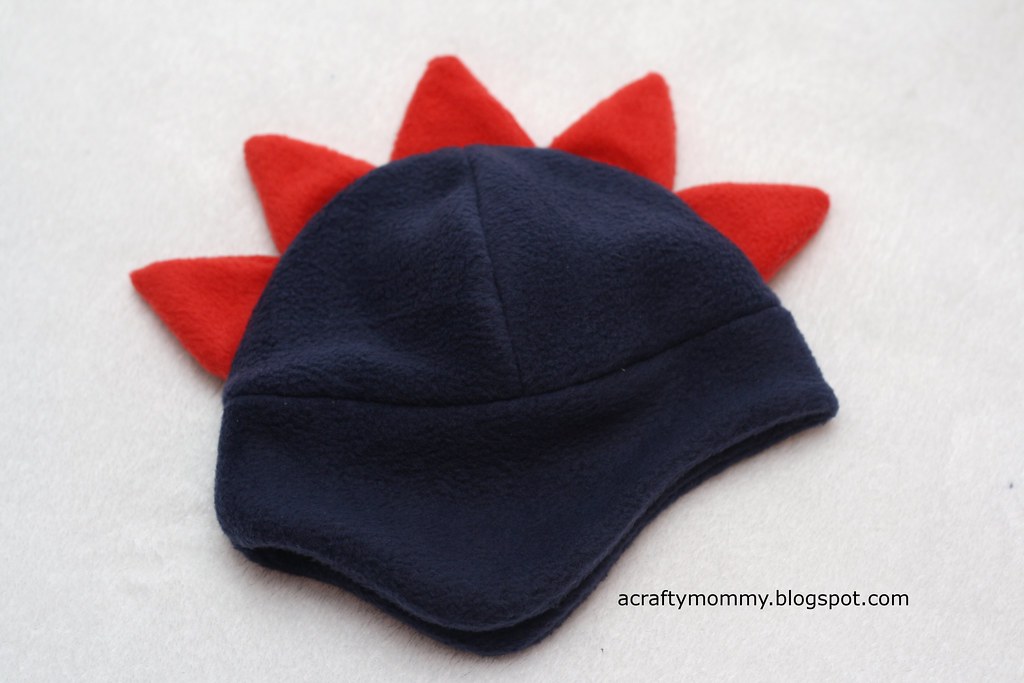
I made it with fleece which doesn't fray, that means no finishing seams, and I did no ironing!
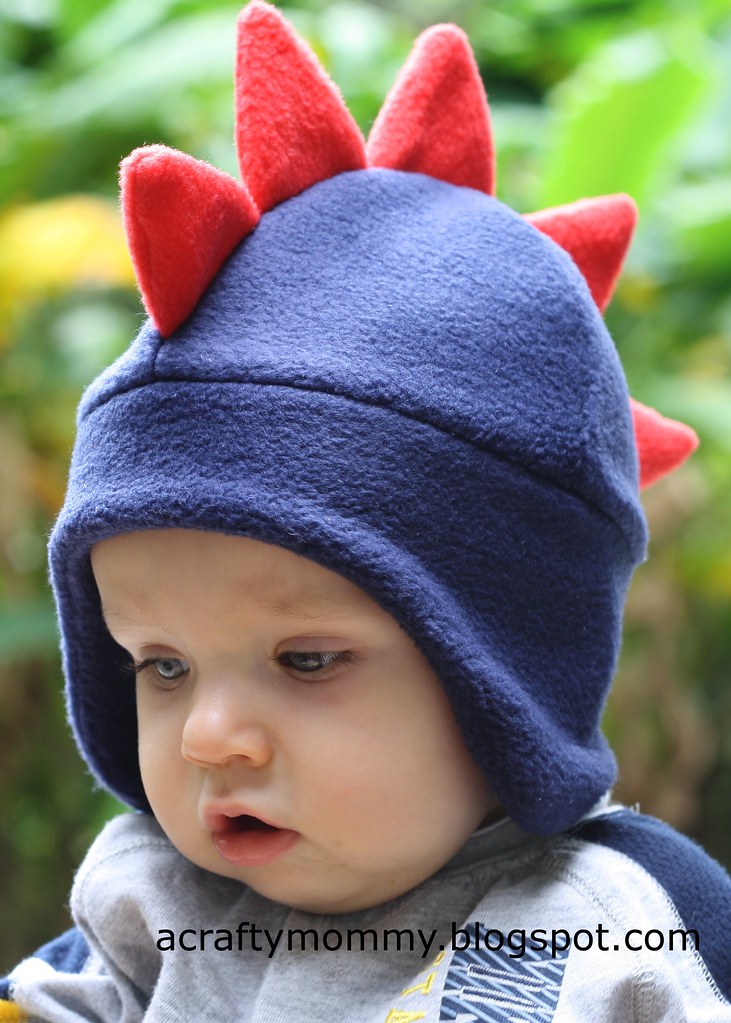
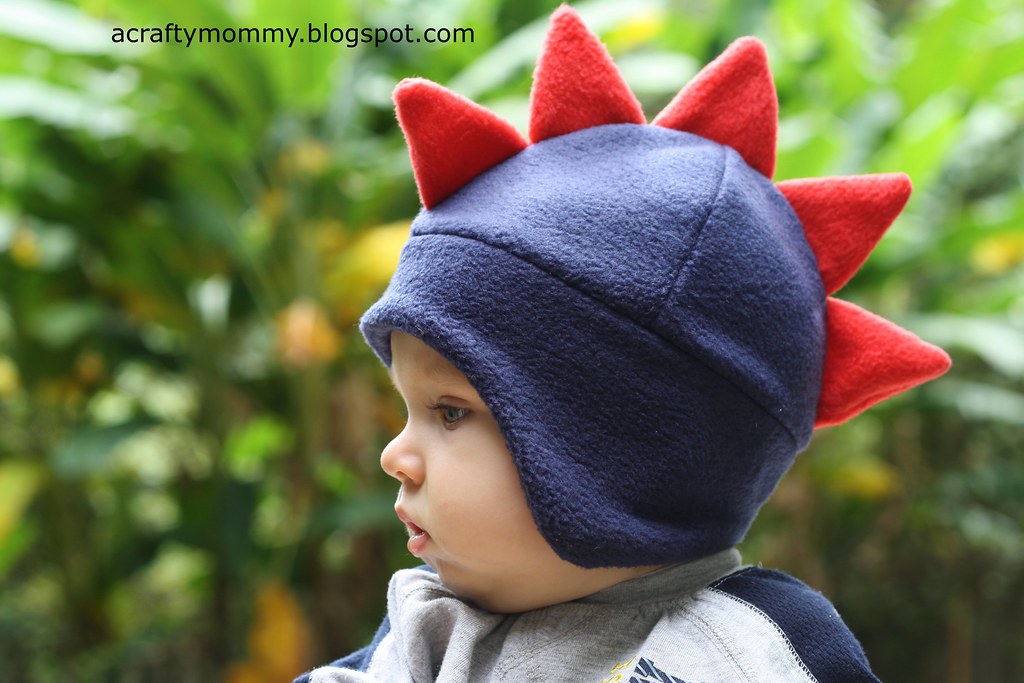
I think it turned out super cute, the dino look is perfect for a little boy and it should keep his head and ears warm this winter. And I think my little guy likes it too!

Here is how I did it...
Skill Level: beginner
Materials:
1/4 yard fleece for hat
a bit of contrasting fleece for dino points
sewing machine
If you make your own pattern you will need a ruler, paper, and marker. If you little ones head is 19" like Andrew's, you can download my pattern here.
To make my pattern, first I measured Andrew's head, it is 19" exactly. To make the pattern for the ear flap, I added 1/2" to his head circumference (for seam allowance) then divided that number by 2.
19"+.5"=19.5"
19.5"/2=9.75".
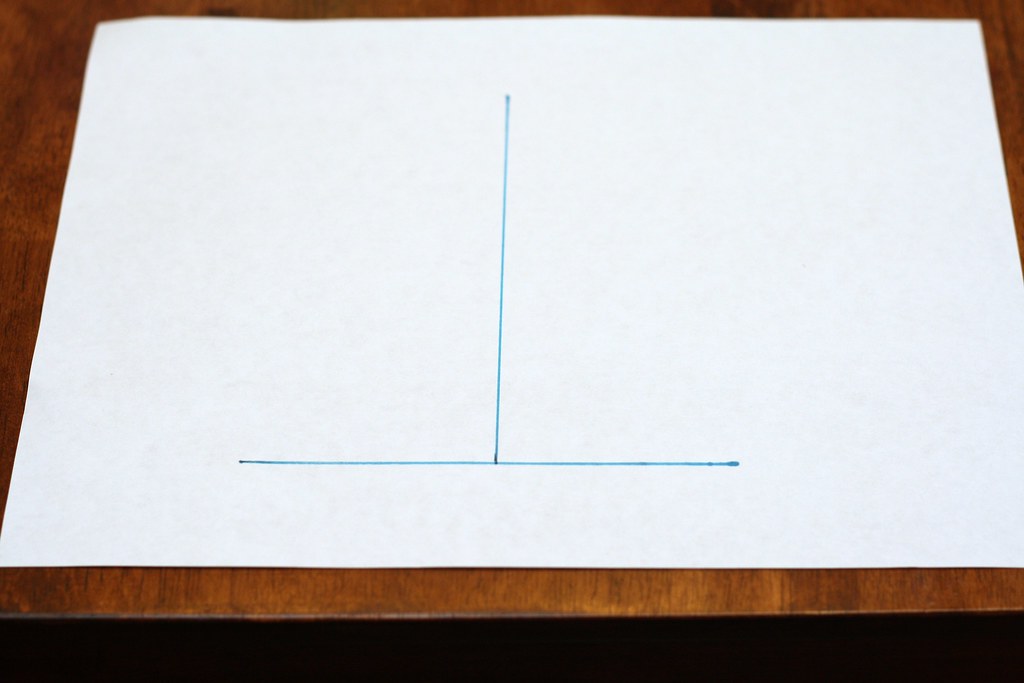
I drew a line 9.75" on my paper. Then I drew a 2" line down from one end, a 2.5" line down on the other end and a 4.5" line right in the middle.
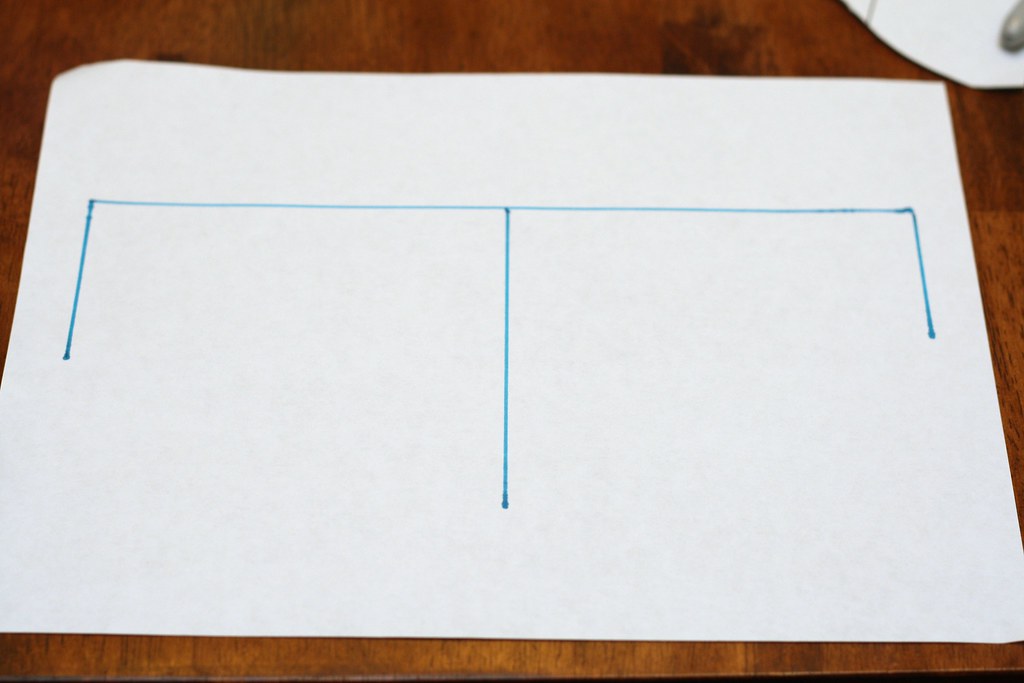
The side with the 2.5" line is the back, the 2" side is the front and will be on the fold when you cut out your patter. I wanted the ear flap closer to the back for it wouldn't get in his face, so I free handed the ear flap closer to the back.
Next I drew the pieces for the top of the hat. to get the measurements, I divided his head circumference by 4 since I will have 4 pieces. then added 1/2" for seam allowance.
19"/4= 4.75"
4.75"+.5"=5.25"
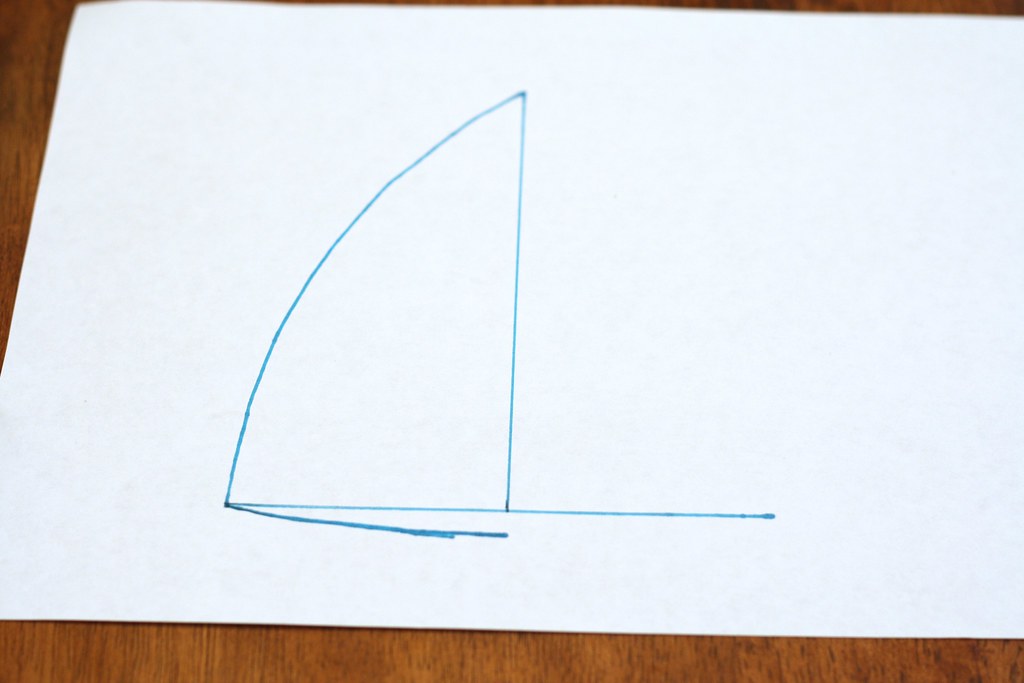
I drew a line 5.25" on my paper and in the middle of that line, I drew a line straight up 5.75"
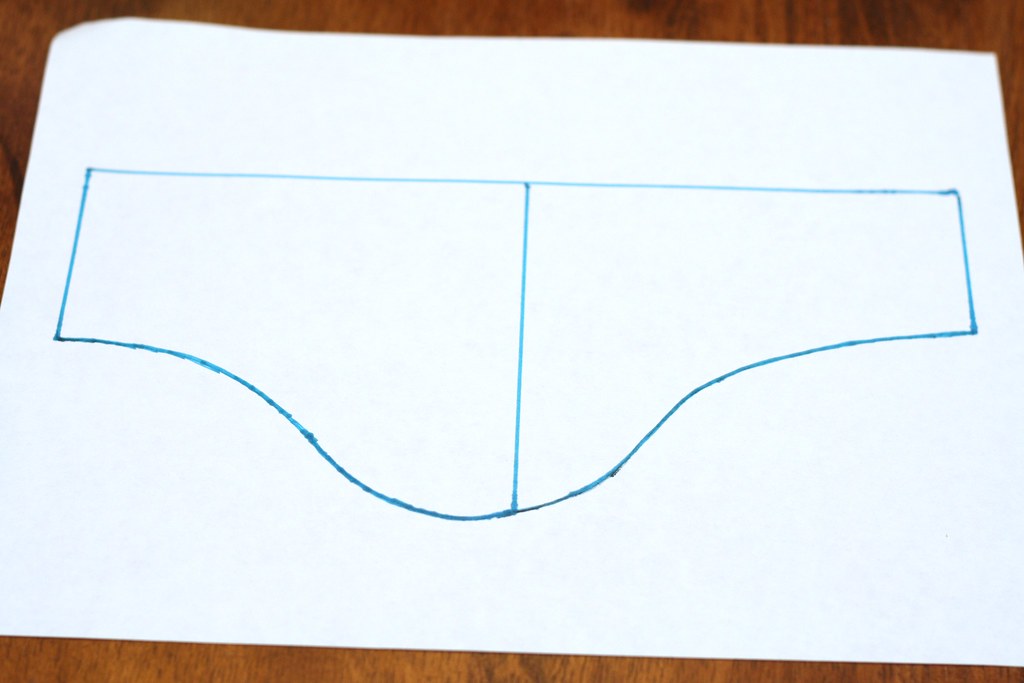
Then I drew a curved line from the bottom line to the top line and a slight curve across the bottom. I only drew them on one side, then I folded my pattern in half to cut it out so it would be symmetrical.
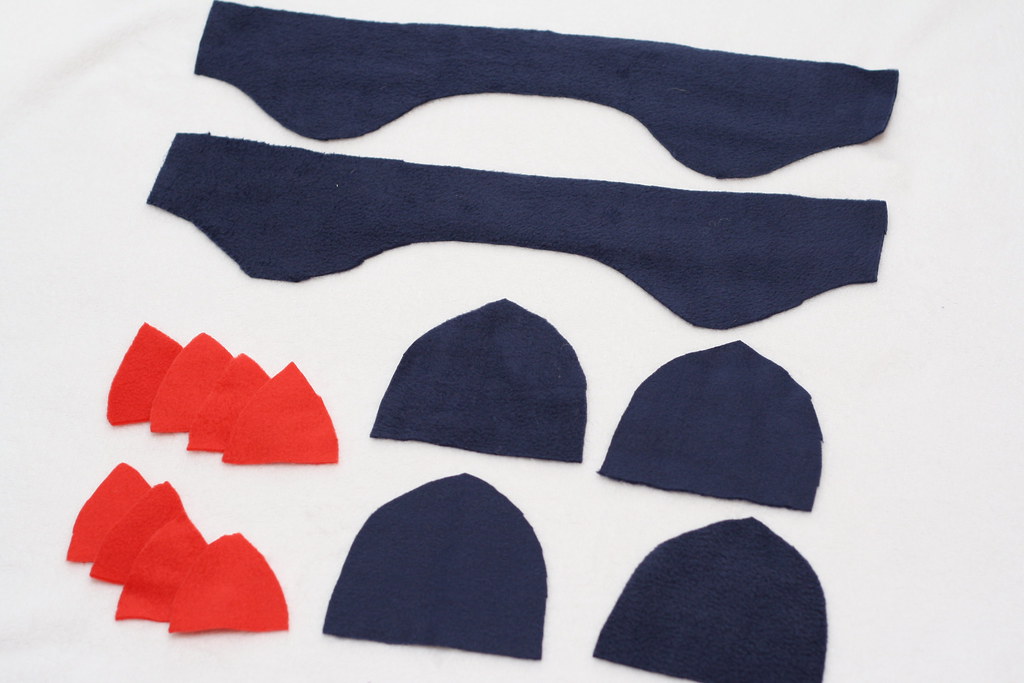
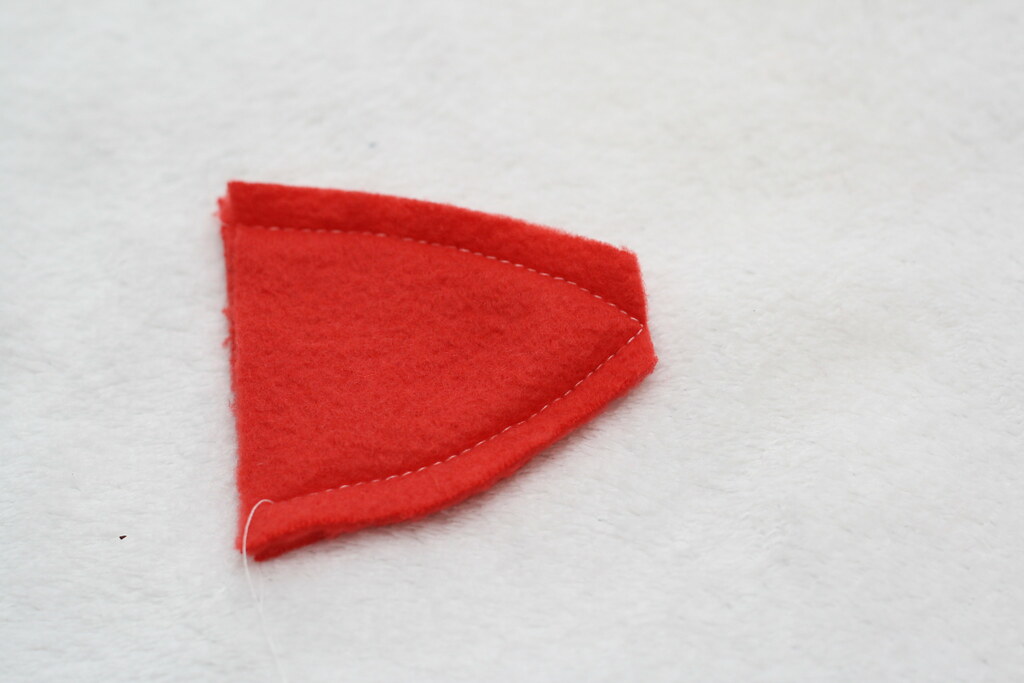
And you have your pattern! Now cut out 2 of the ear flap pieces (remember to put the front side on the fold) and 4 of the triangle pieces for the top of that hat. Then I cut out 10 little triangles for the top, I made mine about 2.5" high and 2" wide.
Take two small triangles and sew them right sides together
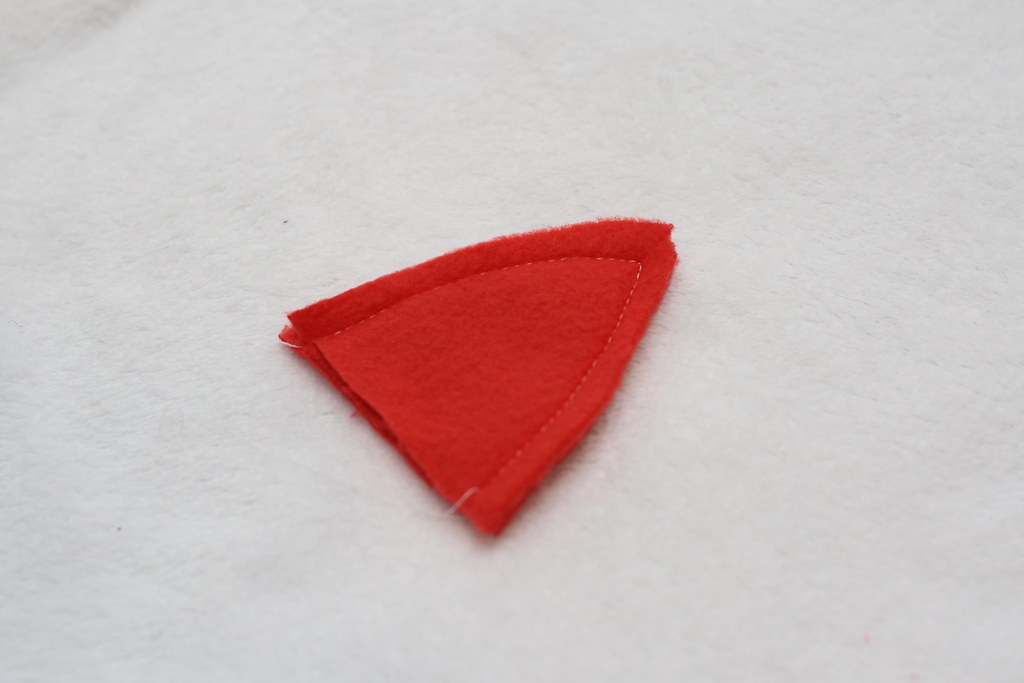
Trim the top corner off so there is not so much bulk inside.
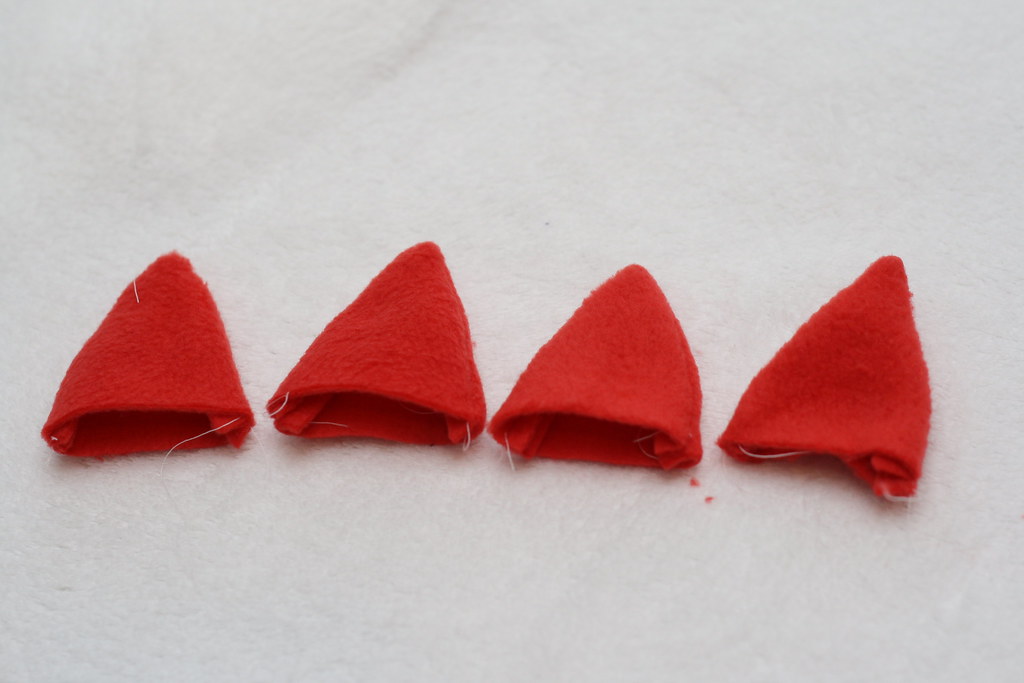
Then turn the triangle right side out. Repeat with the other triangles.
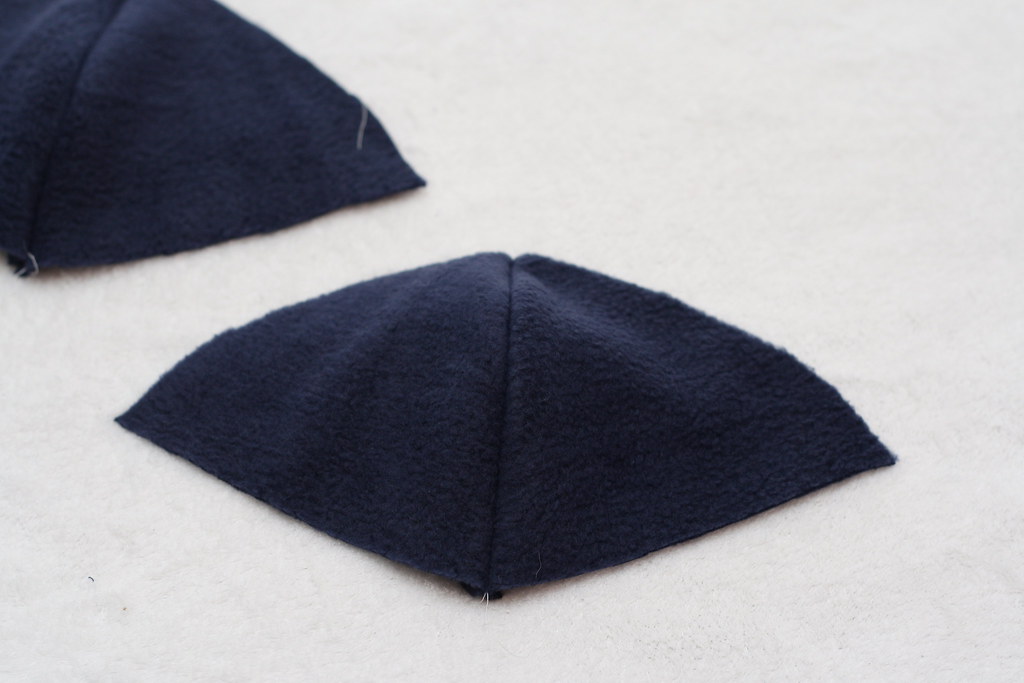
Next take 2 of the bigger triangles and sew them right sides together along one side. Repeat with the other 2 triangles, these will make the top sides of your hat.
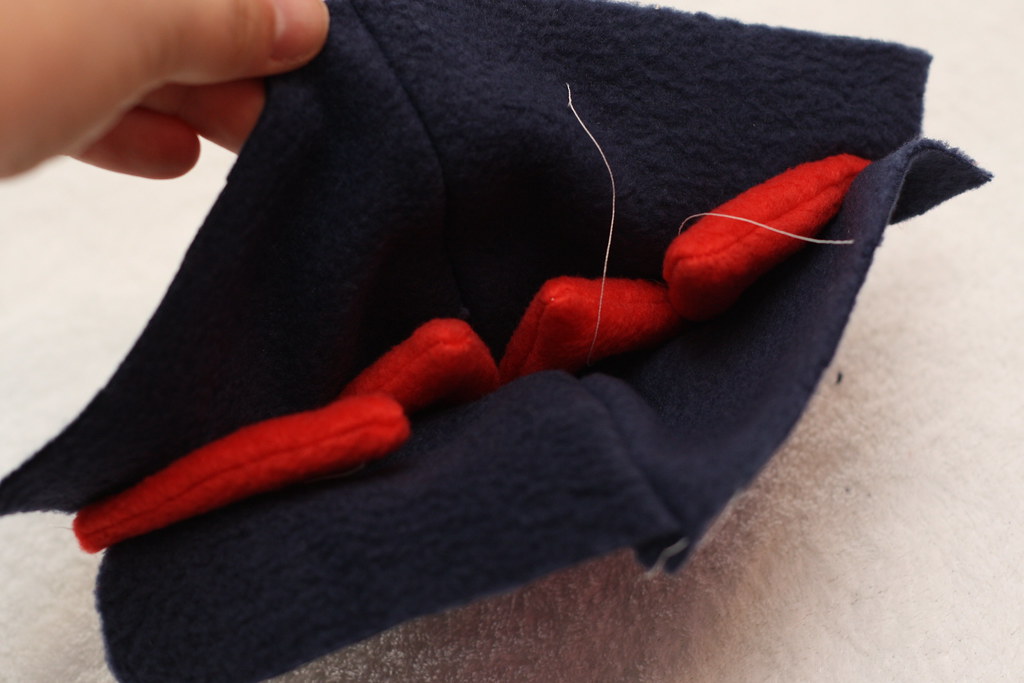
Pin the sides together (right sides together) with the dino triangles sandwiched in between, pointing down.
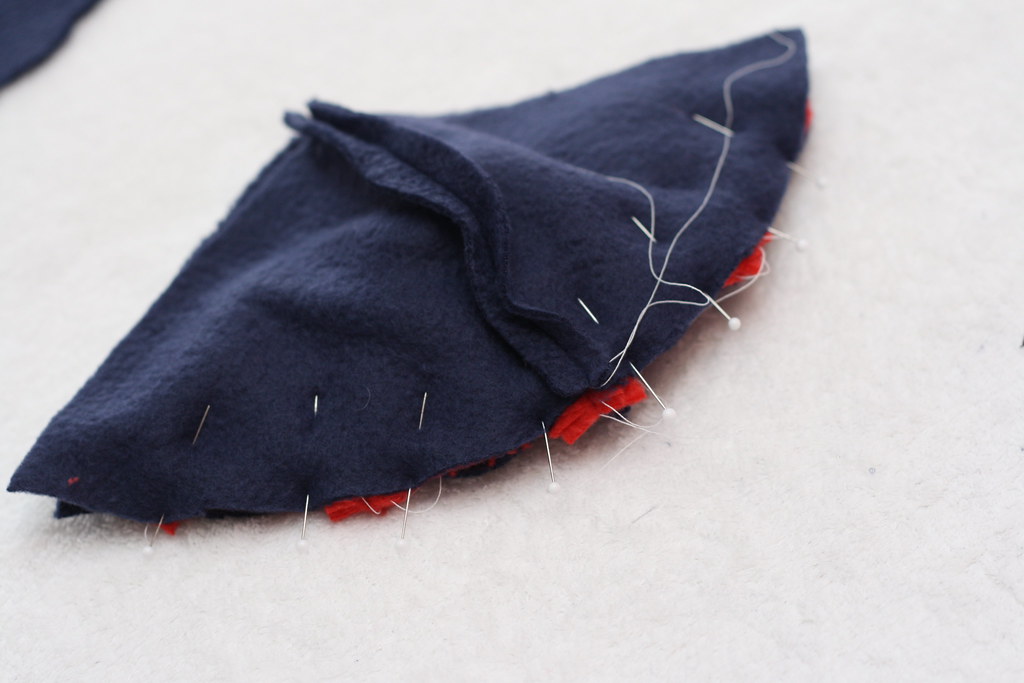
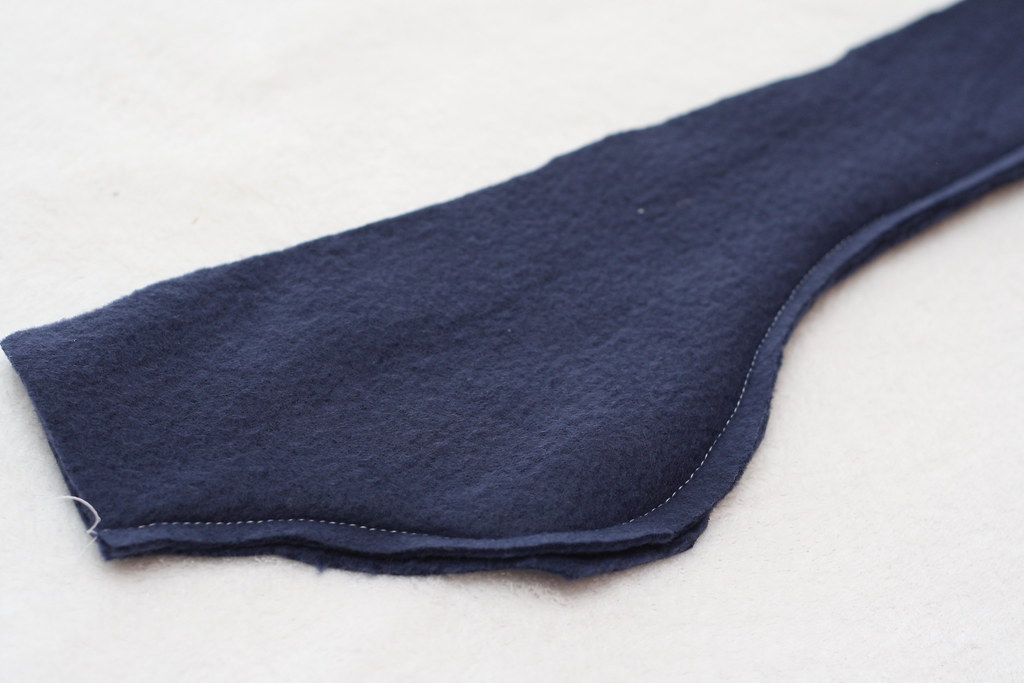
Sew them together and put the top of the hat aside. Grab your 2 ear flap pieces. Place them right sides together and sew along the edge.
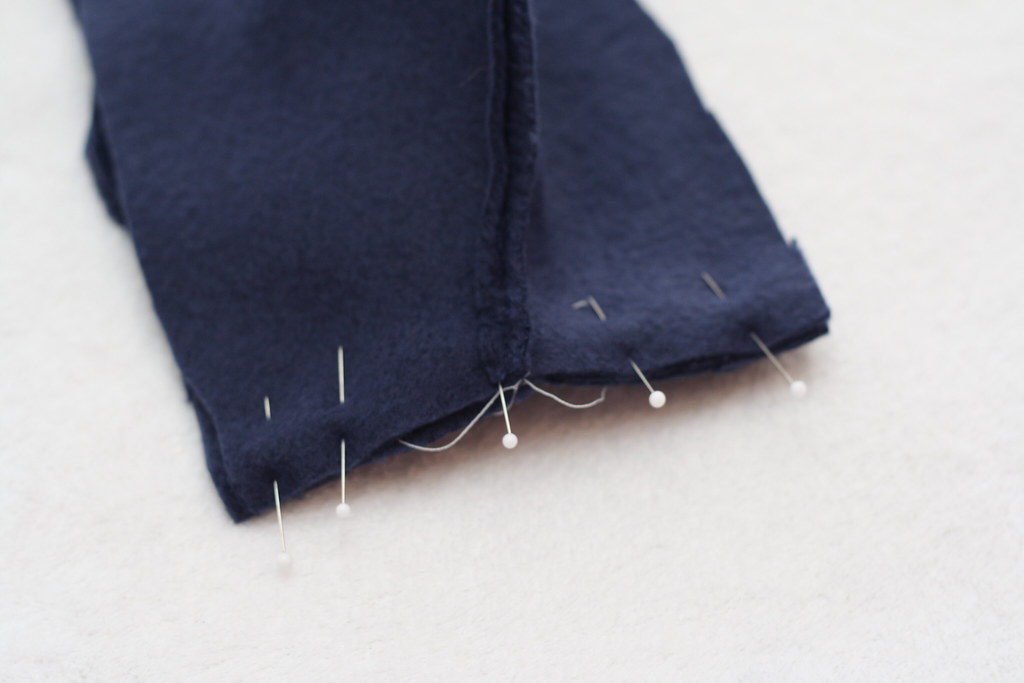
Open both ends and put them right sides together. Line up the seams, pin in place, then sew along the edge.
Turn your ear flap band right side out. Pin the top of the band to the top of your hat. Start by lining up the back seam of the band with one of the seams on the top where the dino points are.
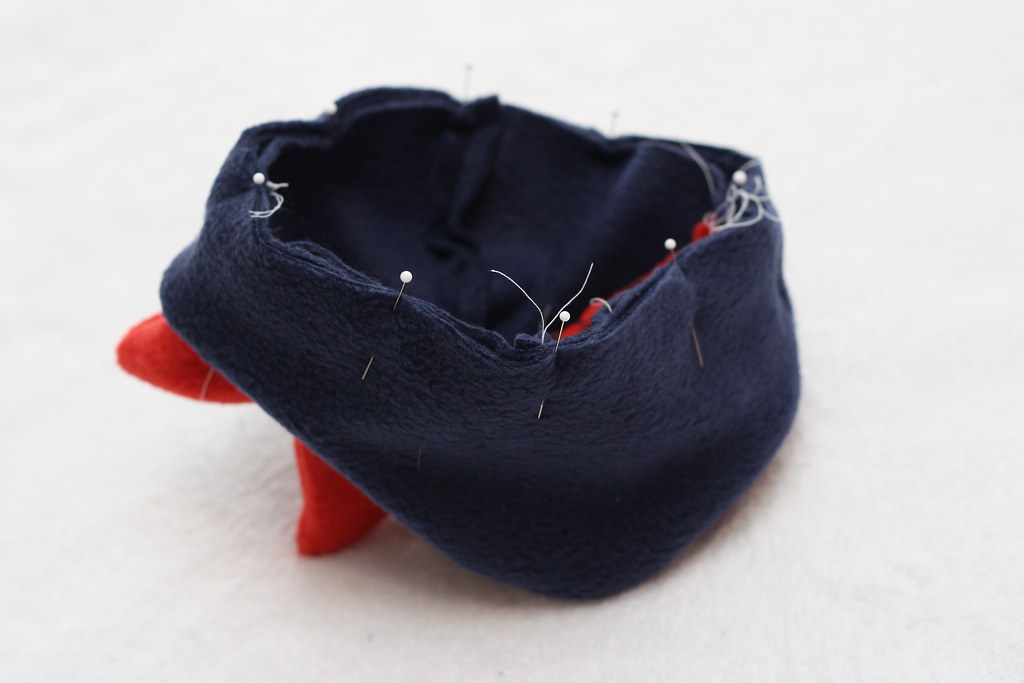
Sew the band to the top of the hat and you are done!
Put your hat on your little one and enjoy! Then take a picture and share it in my flickr group, I would love to see it!
Put your hat on your little one and enjoy! Then take a picture and share it in my flickr group, I would love to see it!
I LOVE this!!!!!!
ReplyDeleteThanks Alicia! You should make one, it would look great on OB!
ReplyDeleteI just finished my little one's turkey hat last night and it looks great. Thank you for the great step by step and very detailed tutorial!
ReplyDeleteTwo questions: How do you come up with the 4.50" and 5.5" measurements? Do you know the "formula" for larger heads so I can make one for myself?
Thanks again
arizona_angie@yahoo.com
Alright, I made a turkey and reindeer hat for my 1 year old using your pattern. Now her 27 year old uncle wants a reindeer hat to match! Do you know of site that helps you with converting the noggin measurements into a usable pattern? I have been searching and have found nothing.
ReplyDeleteThanks!
arizona_angie@yahoo.com
A reindeer hat, how cute! Did you get my email on the 24th with the measurements to try for a bigger hat? I will try to send it again.
ReplyDeleteThis comment has been removed by the author.
DeleteBig Thanks from Hungary!!!
ReplyDeletelove the ear flaps! thanks!
ReplyDeletecan you email me the instructions for making this bigger for an adult
ReplyDeletecyn2983@gmail.com
You are an angel! My son just lost his dinosaur hat at a restaurant in NY while we were on vacation. Someone at the restaurant was holding it for us but it has since disappeared (sticky fingers). He is devastated and so am I, so I googled "fleece dinosaur hat" and discovered this, which is a near DUPLICATE of his missing hat! I cannot wait to do this for him, THANK YOU THANK YOU THANK YOU!!!!
ReplyDeleteHey Crystal,
ReplyDeleteI just wantet to say thanks! I used your wonderfull diy, to make a tiger hat for my son!
http://soegaard-expressen.blogspot.dk/2014/02/fastelavn-tigeren-han-er-nu-bedst.html
THANKs!
Camilla
How do you come up with the 4.50" and 5.5" measurements? Do you know the "formula" for larger heads so I can make one for myself? can you email me the instructions for making this bigger for an adult?
ReplyDeleteThis comment has been removed by the author.
ReplyDeleteHi Crystal,
ReplyDeleteI have made several of these hats for my kids and they are awesome! However, I have been wondering how to size them up to make them a little roomier. Can you explain how you determine the size of the 4 pieces to make the crown of the hat? I'd also like to make one for myself but can't quite figure out how to increase the size of the pattern based on these measurements.
Can you email me instructions for making larger sizes?
ReplyDeletearmadillocrafts@hotmail.com
Can you email me instructions for making larger sizes?
ReplyDeletearmadillocrafts@hotmail.com
Thanks for sharing this pattern and the directions. Luckily for me, my kid's head is 19". I made it in about an hour from some scrap fleece while my little one napped.
ReplyDeleteThanks for these clear and inspiring instructions. I made 24 hats for kids and adults some with dino scales some ears some wings... They are very warm. Everyone loves them.
ReplyDeleteThank you so much for this fabulous pattern and instructions. I've just made my second one, as my granddaughter has grown out of the first one (what was her 17" head is now 18"). I left out the dinosaur scales, but added a couple of bunny ears instead to the first one. The second one is just plain (I was in a hurry!). My daughter absolutely adores them!
ReplyDeleteDear Crystal, if it's not too much trouble, I would just love to know how you calculate making a larger size hat -- I am hoping to make one for my 4 year old boy :) My email address is megkfowler1@gmail.com -- thank you!!
ReplyDeleteps. thanks for this awesome tutorial in the first place!!!
DeleteThis is adorable!! I am hoping to adapt it for my 2.5 year old for a bunny costume - I see a lot of people requesting you email them your formula for a larger head- would you mind posting that information here? (Or emailing me at Lindalea.w@gmail.com) thank you!
ReplyDeleteWonderful template. Exactly what I needed. Thank you!
ReplyDeleteI also need formula for bigger heads. Thanks :)
ReplyDeleteHi - Do we cut the pattern on the lines, or do we add the 1/2" seam allowance when cutting? I've cut it out, but it seems too small when I sew it together. Thank you!
ReplyDeleteThis was such a great tutorial! Fun and easy to make. Thank you!
ReplyDeleteWould love the formula for bigger heads :) jgriffin2011@my.fit.edu
ReplyDeleteThanks so much for posting this! It is so much fun and really easy for a newbie to follow!
ReplyDeleteThe costume rendition comes in different hues - greens, oranges and reds. In any case, the look is practically the equivalent: a general jumpsuit with character hoods and decent, scalloped wing at the back. animatronic dinosaur
ReplyDeleteThis comment has been removed by the author.
ReplyDeletethank you for your interesting infomation. snapback mitchell and ness
ReplyDeleteThis particular is usually apparently essential and moreover outstanding truth along with for sure fair-minded and moreover admittedly useful My business is looking to find in advance designed for this specific useful stuffs… custom hats cheap
ReplyDeleteCould I also get your formula for making this for larger heads? I made one for my baby, and now grandpa and grandma want matching hats. So I'm making them for the whole family! USanborn@gmail.com
ReplyDeleteMay I also have the formula for larger sizes? Sarah.McCarthy757@schools.sa.edu.au
ReplyDeleteMany thanks for a great tutorial!
This comment has been removed by the author.
ReplyDeleteIs it still possible to receive the Larger size formula? My email murray713@gmail.com
ReplyDelete